Picture this: you’ve built a cool website or developed an app that you’re super proud of. Now you want to get feedback from friends or colleagues, or maybe you’ve got a client who needs to review it. But setting up a server, buying a domain, and handling all other nitty-gritty details feels like trying to climb Everest without shoes. Enter LocalXpose—your new best friend in sharing local applications over the internet effortlessly.
What is LocalXpose?
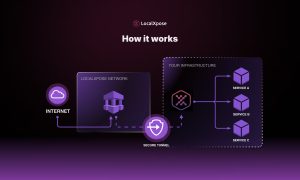
LocalXpose takes your local application and exposes it over the internet with a public URL, as simple as lending a cup of sugar to a neighbor. No more wrestling with port forwarding, static IPs, or other mystical IT stuff that makes your brain hurt.
Getting Started: Step Up Your Game
First, head over to the LocalXpose website and download the application. No smoke and mirrors here; the installation is straightforward. Once you’re up and running, you’ll need an account, which is free to create. Pro tip: Bookmark the dashboard. You’ll visit it often.
Quick and Dirty Setup
To create your first tunnel, open the LocalXpose app. You’ll see a CLI (Command Line Interface), which may feel intimidating like a lion’s roar, but it’s pretty friendly once you get to know it.
Run the following command:
“`bash
lx start –http 8080
“`
This will expose whatever you’re running on port 8080 over HTTP. Presto! You get a public URL that you can share like hotcakes. No more setting up servers or opening ports on your router. It’s like magic, except it’s real.
Channels and How to Use Them
LocalXpose supports various channels like HTTP, TCP, UDP, and TLS. Switching between them is as easy as pie. For instance, if you’re working with a TCP application, your command might look like this:
“`bash
lx start –tcp 7070
“`
Each channel gives you a public address suited for that type of connection. Simple commands, no headaches.
Custom Subdomains: Your Project, Your Name
Fancy a personal touch? LocalXpose lets you create custom subdomains. Who doesn’t like a personal flair? You can specify a subdomain with a command like this:
“`bash
lx start –http 8080 –subdomain=mycoolapp
“`
Now your link has your project’s name in it, making the whole scheme neat and professional. Your friends will be impressed, and so will your clients.
Security Matters: Always Stay Safe
Worried about security? Who isn’t nowadays? LocalXpose encrypts your data using HTTPS and TLS, making sure your information stays behind a digital fortress. No running naked in front of the hacker crowd.
Advanced users can add token-based authentication to allow only specific users to access your tunnels. Keep it exclusive like a speakeasy club.
“`bash
lx start –http 8080 –token=mysecrettoken
“`
Monitoring and Statistics
No need to play Sherlock Holmes to know who accessed your tunnel. LocalXpose’s dashboard gives you all the analytics you need. Log in, and it’s all laid out like Sunday morning pancakes.
Trouble? Think Again
Like every tool, sometimes things go weird. If something’s afoul, check out the LocalXpose documentation or hit community forums. Folks there are about as friendly as a golden retriever. They’ve been through the trenches and can help sort quirks faster than a cat on a hot tin roof.
Wrapping Up Your Tunnels
When you’re done, cleaning up is a breeze. Just stop your tunnel with a simple:
“`bash
lx stop
“`
Your local project is back to being your little secret. No muss, no fuss.
Final Thoughts
LocalXpose is like a Swiss Army knife for developers, making the whole ‘sharing-your-work’ process a complete no-brainer. You’ll wonder how you survived without it—or why you even tried. So, go on, open those digital floodgates and let your masterpiece shine.